 |
| Image: DIY Nautical Headband by Presser Foot |
I saw some $6 kids' striped polo shirts at K-Mart, and decided that I could turn them into something a little more special - and nautical, of course, to fit in with the upcoming Southern Hemisphere summer. They were OK on their own, but pretty basic.
They were already striped, so that's a good start for the nautical look.
The thing about embellishing a shirt like this is that you can choose how far to take the embellishment. One of the easiest things you can do is simply change the buttons. I took the polo with me to the craft/fabric store and matched the size of the buttons to some shiny anchor buttons. It is important to get the same size buttons as already on the shirt (or as similar as possible). Otherwise, they most likely will not fit through the buttonholes.
Snip or unpick the threads holding the buttons on, and remove. Set them aside if you like, for a future project!
Now sew on your new shiny buttons, in the same place as the old ones. Double your thread or use embroidery floss (like for cross stitch) for extra hold. Slip the new buttons through the buttonholes and check it out!
Below you can see a side by side comparison of an unchanged polo and one that has simply had the buttons changed. You could stop here if that's fancy enough for you.
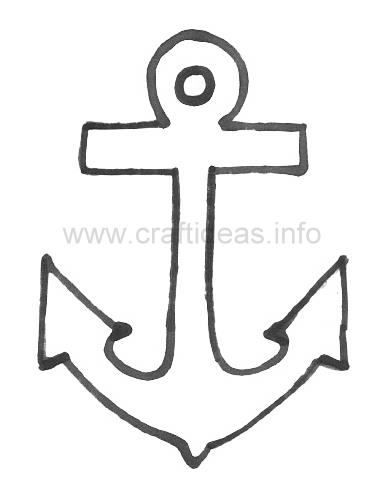
I wanted a design on the shirt as well, and settled on an oversized anchor. A quick google image search for 'anchor template' turned up this delightful number from Craft Ideas, which you can download here.
You can also use a store bought iron on patch if you prefer to skip this step. If so, iron on the patch and you're finished!
Print out your template and cut it out.
Iron a fabric square a little bigger than the size of the cut out template to some double sided iron on interfacing. You may know this as Wonder Under, Vliesofix or Heat & Bond. Any of these is fine, just make sure it's the double sided stuff, to make this easierand quicker for you. You can use single sided iron on interfacing, but that will make your job a little harder.
At this step, I traced around the template onto my interfaced fabric, with my fabric pen that disappears when you wet it, and then cut out the shape. It's easier to cut after being interfaced, the cut will be straighter as the fabric is sturdier.
The pen is definitely a worthwhile investment! If you don't have one, any pen or chalk will do, or if you are worried about marking your design, just pin the template to the fabric and cut.
Now iron on your cut out anchor shape to your polo shirt, following manufacturer's instructions. If it didn't come with instructions, google 'double sided fusible interfacing tutorial'. There's heaps of them out there.
If you used single sided iron on interfacing, you'll now need to pin the shape to your shirt and sew around it at this point.
Your shirt should look a little like this. Note one polo has new buttons, one without, to show you what the polo would look like if you choose not to change the buttons.
If you don't like to sew, you can finish here, although sewing around the shape will make it last much longer through laundering and tumbledrying.
For the sewers, simply topstitch around the shape, don't worry too much about keeping a perfect shape. If the thread is the same colour, no one will even notice that corner is not perfect!
If you want to have a contrast here, you could use a different colour topstitching thread, or even a thicker thread. You could also handstitch around it with embroidery thread if that takes your fancy.
In any case, you're finished! Trim your threads and get someone to try on their new shirt.
Apologies for the iPhone pics! I really need to get batteries for my real camera soon!


No comments:
Post a Comment