Thursday, March 28, 2013

Mini Tutorial: Mounting Stamps / Recycling!

I've been looking at some those floppy stamps that you are supposed to mount on special acrylic blocks. I got them for free with a scrapbooking magazine, which was exciting. Who else loves free stuff?!? I know I do.


I am not a big stamper, but very occasionally use them in scrapbooking, so it has not been a huge priority for me to buy any of the blocks. It's still been bugging me to have them sitting around useless, so I've been thinking about mounting them a different way. I thought about asking Mr Tempest to cut some timber to size. That would work. Then I was shuffling some things around in a drawer and found the perfect solution.

Who else has some of these babies in a junk drawer?


 These have outdated addresses on them so I can't use them any more. They also have plenty of ink left, which could make crafty stamping relatively mess free. They're easy to use and give pretty much perfect coverage every time. They seemed like they must be useful for something in the future! And now they are.

A couple of my freebie stamps were just a little bigger than the stamp plate allowed for. For these, I put the stamp in the 'locked' position, so that it stays stamp side down and doesn't re ink itself. I then removed the old address stamp with some tweezers. They came off relatively easily, just a bit of wriggling and pulling with the tweezers.


I then mounted the stamps on the now bare stamp plate, with double sided foam tape. One plate wasn't quite level with the base of the stamp, so I used 3 strips of foam tape, stacked on top of each other. For stamps narrow enough to fit entirely on the stamp plate and be re inked, I simply used foam tape to attach them. Any double sided tape or adhesive runner should work, I would think. This way, if I want to change the stamp in the future, I can just peel it off.


I noticed that with one of these, the stamp pad had obviously been marked by the previous stamp, which meant there was letters showing through my stamped images.


 I think it looks kind of cool, but if you don't like it, just change the stamp pad in the stamp (if you can), or use like a normal stamp on a separate stamp pad. This is also how I use the ones in the 'locked' position that are too big to be re inked by the address stamp.

Word of warning: if you use the stamp in the locked position, and stamp it on a conventional stamp pad, you'll get a border around the stamp (picture above left), unless you wipe it off before stamping. You can also partially wipe for a 'distressed' look.

I kind of like this versatility - two or three looks in one!

Now I am just waiting for the right project to use my stamps on! I hope this helps someone else.

As a bonus, I also mounted one stamp on a glass coffee lid, which works wonderfully. Something to do if you have kept any empty coffee jars.


Thursday, March 21, 2013

Craft Fair Haul

I attended a craft fair today, which is always fun when you have the crafting bug. As usual, I enjoyed wandering the aisles and checking out what everyone was selling and demonstrating.

I even managed to make a few *cough* purchases, which were mostly things I've had my eye on for awhile.


As I'm back into scrapbooking my photos, the purchases were mainly in this crafty area. My pics have gotten totally out of hand over the past few years, and I love making them more organised and creatively presented. It makes boring others with your holiday snaps a little more interesting. I've stocked up on a whole heap of new tools and products, and have been having fun playing with them. More on this in a later post.

One purchase I thought seemed pretty ingenious for scrappers was the metal cutting plate (Cheery Lynn Designs), "to be used as a cutting base for intricate cutting dies". I saw it demonstrated and thought it was pretty great. They have some demo videos on their site. Mine is the deceptively named, "Cuttlehug", which is made to suit the Sizzix Big Shot, not the Cuttlebug as you may imagine.

Thursday, May 17, 2012

Men's Cap Tutorial

I was excited to see this project on my dash the other day, as there really are not a lot of men's tutorials that strike my fancy.


Hubby was not too impressed at first glance with this one, but I love it. You never know, maybe I can talk him around? Or possibly make it for someone else.

Check out the great tutorial at http://aboutgoodness.com/sew/mens-flat-cap-gatsby-hat-pattern-diy-tutorial/ to make your own!

Wednesday, May 9, 2012

Update

I've been keeping very busy sewing winter school uniforms - there has been nothing but navy in twill, fleece and polarfleece under my sewing machine foot for a while now.

I was happy to take a bit of a break and make some pretties to update the shop with - you can find them at the etsy store. I needed to do something with flowers and bling after all that navy!


My overlocker (serger) has been acting up, just as I have become very confident with it - typical! I have managed to fix it a few times now, but I fear it really needs some professional attention. I've had to sew a few of the uniforms above using only the sewing machine, and I've realised how indispensable the overlocker has become. Sadness. I can only hope it is a simple thing to get fixed, and hopefully I can schedule it in soon.
Tuesday, March 27, 2012

What is it that makes a handmade gift so special?


via http://www.melaniefalickbooks.com/


viaaasaa


0
Open
"Creating something by hand for somebody else is a very special thing to do," says Joelle Hoverson, owner of Purl Soho and author of Last-Minute Knitted Gifts and More Last-Minute Knitted Gifts.

Watch Melanie Falick (Weekend Knitting), Andrea Price (Knitspeak), and Hoverson speak about their personal memories of knitting with and for their families and friends, and the joy of creating gifts.

Saturday, February 25, 2012

Key Fobs

This morning, I made some key fobs. I've been working way more than usual and not having any crafting time has been bugging me. I wanted to make (and finish) something! Luckily these key fobs take no time at all. I got my fix, and something new for my keys!


Saturday, February 11, 2012

Kimono top for my niece - all finished!


My first Habitual kimono top - made for my sweet toddler niece.

Wednesday, November 16, 2011

Photos: Some recent craftiness


Some recent creations, including two happy customers!

Tuesday, October 18, 2011

Circular patterns

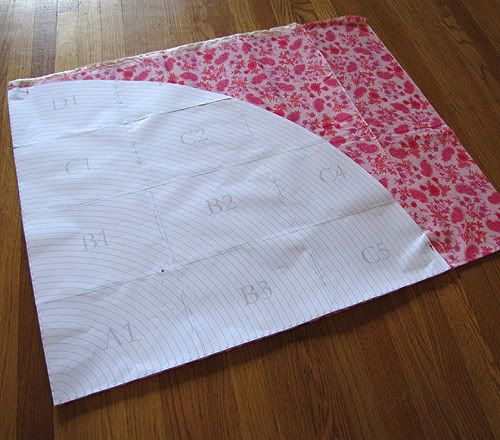
Print out your own circular patterns, thanks to The Scientific Seamstress. For those times when you need to trace a circle, but a jam jar just won't do it! Good for all kinds of handicrafts, not just sewing. Circles included are from  1" to 58" in diameter.

Wednesday, September 28, 2011

Make Your Own T-Shirt Pattern

Found a great tutorial I just had to share - Mad Mim's 'Basic Fitted T-Shirt Pattern'. Make your own pattern with these great pattern drafting instructions.
Image Source: Mad Mim

Thursday, September 22, 2011

Standard measurements - useful tool for those who sew

If you sew/craft for children who may not be in your household, or may be napping as you sew...here's something great from Sugar Art Crafts. Follow the previous link to get a full size table of standard measurements for kids' sizes 3-6! A great resource that I will be using too.

Image: Sugar Arts Crafts

Tuesday, September 20, 2011

Garden Stone Tutorial

This is such a lovely idea...and a nice, personalised touch for your garden or courtyard.
Image: Sunset Gurl Design 

Sunday, September 18, 2011

Sneak Peek - Kids' Messenger Bags - Robots & Bright Blue Denim


Kids' Messenger Bag

Found this great tutorial over at Zaaberry. Can't wait to make some of these CUTE messenger bags for some of the little people in my life.


It didn't take me long to find some matching fabrics to use and prewash/shrink! As they're kids' bags, I anticipate they may need the occasional wash, so best to preshrink now, so the fabrics keep their shape once sewn.

Here, take another look at this cuteness:

Image: Zaaberry
Get the tute at Zaaberry!

Monday, September 12, 2011

Nautically Embellished Polos - A mini tutorial

At the moment, everything nautical seems to be en vogue. Stripes, rope and anchors are popping up everywhere. People really seem to be enjoying the trend - for example, for kids; The Girl Creative's Sailor Pants tute (as well as a guest Sailor Skirt post), Sew and The City's simple sailboat softie tute, Kalleen's Sail Away School Dress; and for adults, the Asymmetrical Maxi Dress by Sew Petite Girl, DIY Nautical Headband, Nautical Belt tute, Nautical Dress Tutorial and there's even nautical nail art video tutorials on YouTube!

Image: DIY Nautical Headband by Presser Foot

I saw some $6 kids' striped polo shirts at K-Mart, and decided that I could turn them into something a little more special - and nautical, of course, to fit in with the upcoming Southern Hemisphere summer. They were OK on their own, but pretty basic.


They were already striped, so that's a good start for the nautical look.

The thing about embellishing a shirt like this is that you can choose how far to take the embellishment. One of the easiest things you can do is simply change the buttons. I took the polo with me to the craft/fabric store and  matched the size of the buttons to some shiny anchor buttons. It is important to get the same size buttons as already on the shirt (or as similar as possible). Otherwise, they most likely will not fit through the buttonholes.

Snip or unpick the threads holding the buttons on, and remove. Set them aside if you like, for a future project!

Now sew on your new shiny buttons, in the same place as the old ones. Double your thread or use embroidery floss (like for cross stitch) for extra hold. Slip the new buttons through the buttonholes and check it out!


Below you can see a side by side comparison of an unchanged polo and one that has simply had the buttons changed. You could stop here if that's fancy enough for you.


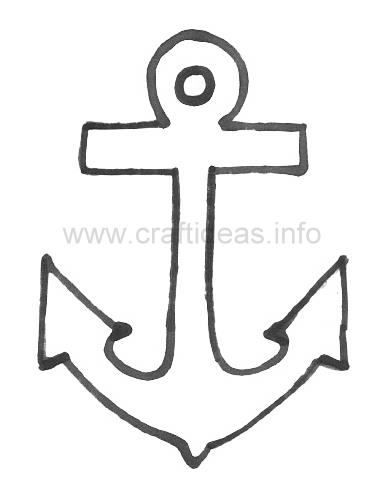
I wanted a design on the shirt as well, and settled on an oversized anchor. A quick google image search for 'anchor template' turned up this delightful number from Craft Ideas, which you can download here.

You can also use a store bought iron on patch if you prefer to skip this step. If so, iron on the patch and you're finished!

Print out your template and cut it out.

Iron a fabric square a little bigger than the size of the cut out template to some double sided iron on interfacing. You may know this as Wonder UnderVliesofix or Heat & Bond. Any of these is fine, just make sure it's the double sided stuff, to make this easierand quicker for you. You can use single sided iron on interfacing, but that will make your job a little harder.

At this step, I traced around the template onto my interfaced fabric, with my fabric pen that disappears when you wet it, and then cut out the shape. It's easier to cut after being interfaced, the cut will be straighter as the fabric is sturdier.


The pen is definitely a worthwhile investment! If you don't have one, any pen or chalk will do, or if you are worried about marking your design, just pin the template to the fabric and cut.

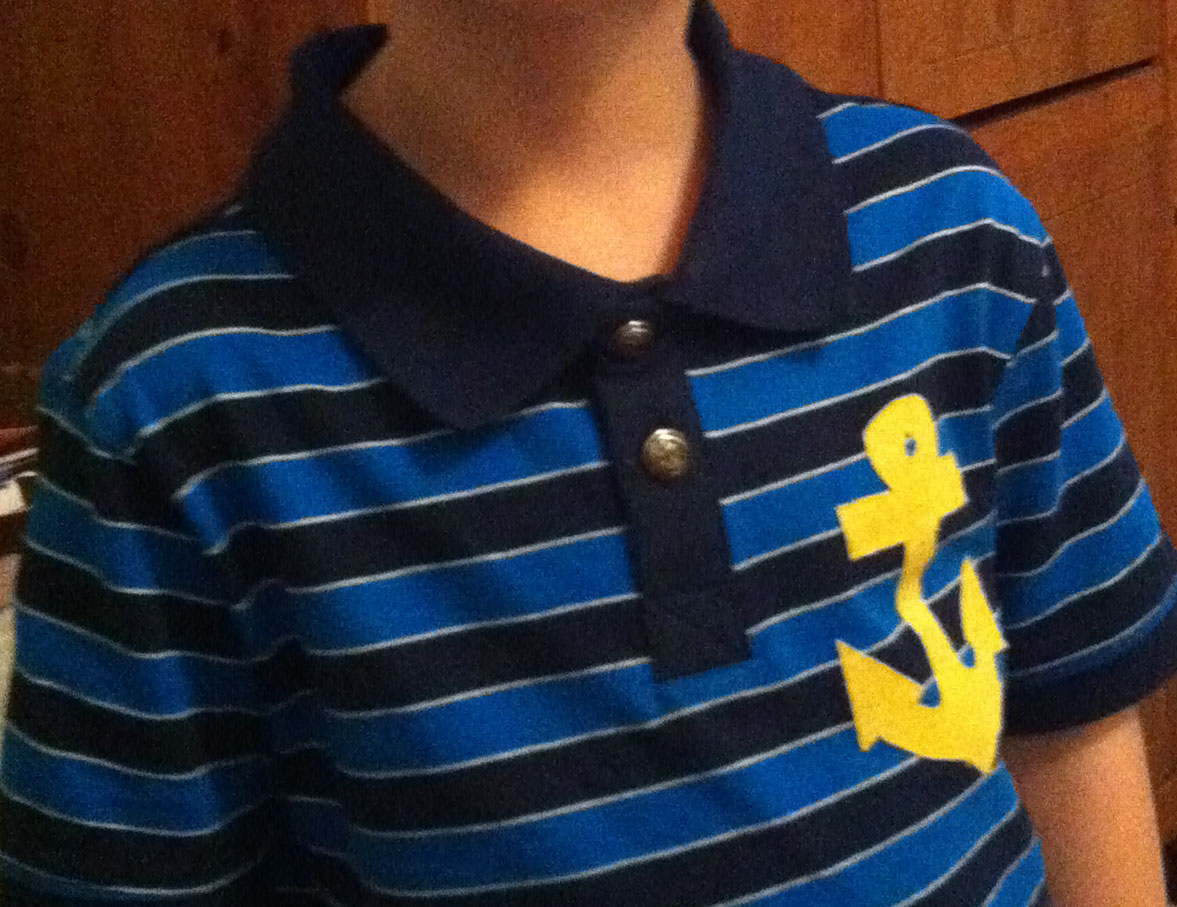
Now iron on your cut out anchor shape to your polo shirt, following manufacturer's instructions. If it didn't come with instructions, google 'double sided fusible interfacing tutorial'. There's heaps of them out there.

If you used single sided iron on interfacing, you'll now need to pin the shape to your shirt and sew around it at this point.

Your shirt should look a little like this. Note one polo has new buttons, one without, to show you what the polo would look like if you choose not to change the buttons.


If you don't like to sew, you can finish here, although sewing around the shape will make it last much longer through laundering and tumbledrying.

For the sewers, simply topstitch around the shape, don't worry too much about keeping a perfect shape. If the thread is the same colour, no one will even notice that corner is not perfect!

If you want to have a contrast here, you could use a different colour topstitching thread, or even a thicker thread. You could also handstitch around it with embroidery thread if that takes your fancy.

In any case, you're finished! Trim your threads and get someone to try on their new shirt.


Apologies for the iPhone pics! I really need to get batteries for my real camera soon!

Adding Pockets to Pants

If the idea of sewn in pockets (as opposed to patch pockets) scare you, this tutorial by Shwin & Shwin makes them seem a little easier.


I know I will be combining this tutorial with the tried and true Kid Pants pattern for my next pants project! I'll make sure to let you know how they turn out.

Sunday, August 21, 2011

New vest

Today I finished this little vest for my niece's birthday present, although this post will be delayed so it stays a surprise until after the party. The fabric was so lovely I couldn't resist, even though it was more than I'd usually pay for fabric for a child's garment. She's only little, so it didn't take much, and she's worth it!


It has a really lovely, bumpy texture, and hangs nicely. I combined it with pink denim to ensure it had a decent weight and hopefully washes well. Let's face it, toddler clothes are going to need washing!

I pre-washed and tumbledried my fabrics, as usual. I do this with all my apparel fabrics before sewing, or actually with anything I think might need washing in the future. This way, it's less likely to shrink by a large amount when washed after wear, and the seams stay nice. It drives me crazy waiting for the fabric to be ready for sewing, but it's worth it for the end result.

I know I hate it when I buy something at the shops, and then it shrinks weirdly in the wash and never sits the same way again.


I used a button on this one, without a snap, due to my new buttonholing skill! I love how it turned out. Originally, I had intended to use the patterned fabric on the inside of the vest, but it looked so cute, I couldn't bear to hide it ;)


I've made 2 of these previously, and I really recommend this pattern.

Happy Birthday, munchkin. Love you.


Wednesday, August 3, 2011

More Kid Pants by Made

I've been on a bit of a sewing blitz, getting some projects done that have been on my mind for a while. I just love Dana's Kid Pants pattern, and have been making quite a few. Still have a few to go, along with some requests from friends. They really are a great pattern, and there's a great tutorial to go along with it for beginners.I've enlarged it as the kids I was sewing for are bigger than the made pattern size.


Here's how some of my latest turned out.